
This educational article is going to introduce you to the world of PHP and help you meet its various features. If you are interested in programming and want to start this path with the server-side, SOJECT suggests you read this article to the very end.
What Is PHP?
PHP is one of the most popular programming languages worldwide. Approximately 80% of all websites implement this language. PHP is a server-side, open-source programming language that makes websites dynamic.
PHP Application:
You can use PHP for anything related to servers, from websites to desktop software and telegram bots. One of the best options for developing a website backend is the PHP language.
Why Choose PHP
PHP has proven its capabilities in small and large projects such as Google, Yahoo, Wikipedia, WordPress, etc. So you can choose it with confidence.
Setup Environment to Work with PHP
First of all, you need an operating system, which can be Windows, Linux, or Mac. However, most users prefer Windows.
After the operating system, It’s came to a local server and an editor:
XAMPP Local Server installation:
Since PHP code is executed on the server-side, you need a server to run your code. As real servers are expensive, you have to build a server using WAMP for Windows, MAMP for Mac, and XAMPP for Linux.
However, the best option among the above is XAMPP which is cross-platform and can be used on various OS. XAMPP or Cross-platform Apache Mysql PHP Perl runs on Windows, Mac, and Linux. By Using it, you can turn your system into a local server to execute your server-side code inside it.
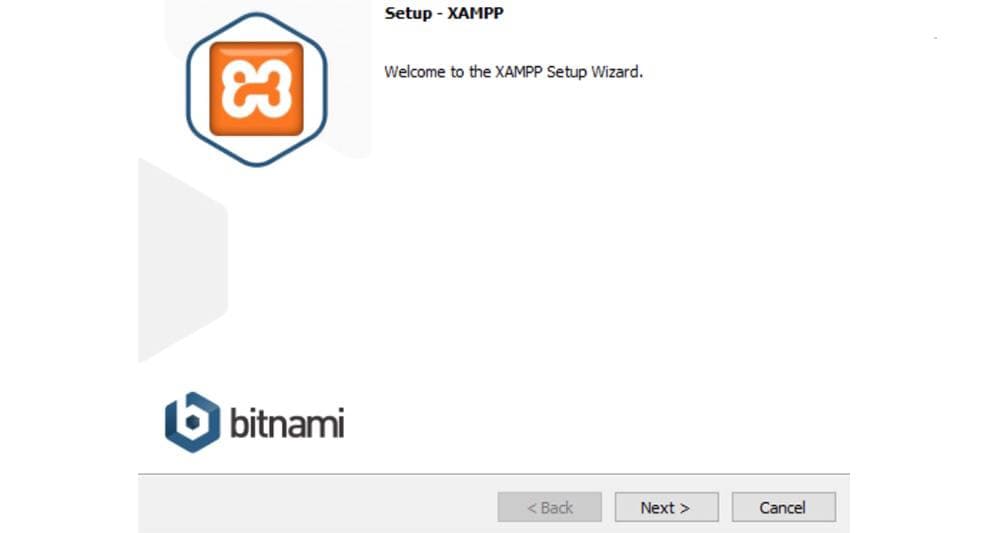
To download the software, browse the XAMPP site and download the software based on your operating system. Run it after downloading, then follow us on the following steps.
Click Next to go to the next step of the installation.
In the next window, as you see in the picture below, check all the options so you can use different features of XAMPP.

Specify the XAMPP installation path if you need it. However, by default, XAMPP will be installed in the System drive, which is C drive mostly.

In the following steps, keep clicking Next to finish installing XAMPP on your operating system.
After installation, you have a folder called xampp on drive C. If you enter this folder, you will encounter a large number of folders. Your projects will be saved in a folder called htdocs.
Installing VS Code and Its Extensions:
You need an editor to edit and develop your code in the right environment. We offer you VS Code. This editor is fast, free, and customizable, and you can prepare your editor environment based on your chosen language.
About VS Code:
VS Code is an editor released by Microsoft written in Javascript and converted to Desktop software with Electron Js. Although no one expected Microsoft to develop and release free open-source software, this company made this editor accessible free of charge for developers around the world.
VS Code Editor is currently the most popular editor. However, editors such as PHPStorm and Sublime Text are also available. In this article, we will learn how to install VS Code.
Install VS Code:
First, browse the VS Code site to download the software according to our operating system. To install VS Code, just keep clicking on the Next button until the end of installing.
Installing PHP Plugins in VS Code:
If you search for “vscode best extension for PHP,” the most popular ones will be displayed. However, we introduce some of these plugins here:
- PHP Intelephense plugin makes working with PHP very easy.
- PHP Debug plugin is used for debugging PHP code.
- DocBlocker plugin is handy for documenting code.
- The Path Intellisense plugin is suitable for easy access to the files and folders.
- Bracket Pair Colorizer plugin is for coloring brackets { }. It helps you more easily recognize different brackets, commands, loops, etc.
- Finally, to make your editing environment much more eye-catching, you can use the One Dark Pro plugin.
Write Your First Code:
After preparing the PHP workspace and installing all the tools needed to write PHP code, it is time to write and execute your first PHP code.
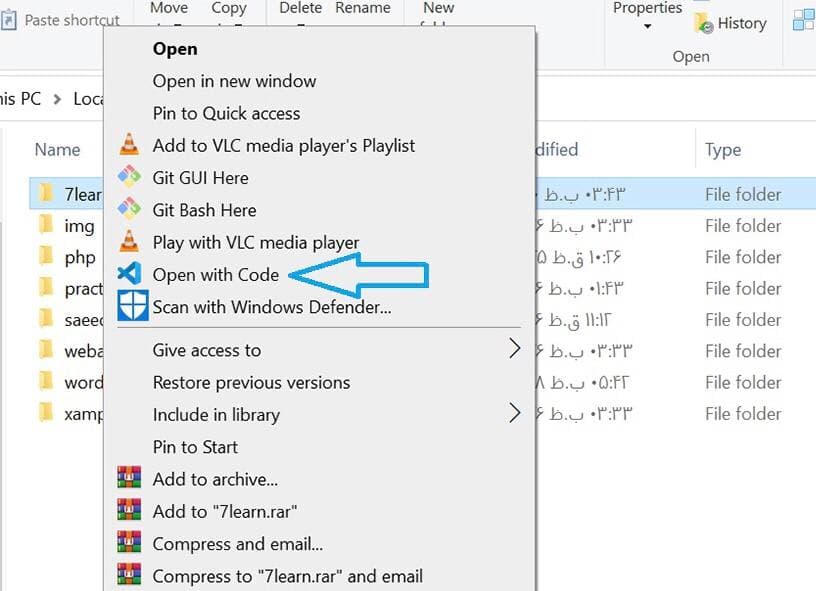
Go to the htdocs folder inside the xampp folder on drive C and create a folder for your project. Now, right click on it and select the “Open with code option” ( VS Code logo is next to it) to open that folder in the editor.
Click the option in the image below, called Explorer, to display the files and folders of the opened folder.

If you already have a file or folder in it, you can see them there. However, if you do not have anything, it shows empty, as you see in the image above. To create a PHP file or any other file, just right-click in the Explorer black environment and choose New File. Then enter the file name with the extension of the programming language. For example, you can create a file named index.php. Files named “index” are recognized and executed by the server by default.
PHP Tags:
To write your PHP code inside a PHP file, you need to write it inside a PHP tag. There are three types of PHP tags, which we examine here:
First tag:
<? =?>
The above tag is a single-line tag for printing text or output; see the example below:
<? = “7learn”?>
Second Tag:
<? // code?>
This type is less commonly used and as a single-line PHP tag.
Third Tag:
<? php
// code
?>
This tag is the most commonly used PHP tag for writing multi-line code.
Note that if you are using this tag in a document that contains all PHP code, you do not need to close it with ?>. Instead, use ?> when you are among the HTML tags and want to write PHP code in a part of it.
Now it’s time to write your first code. It does not matter what the language is; we usually greet the world with a print command at the beginning of coding.
<? php
echo “Hello World”;
?>
Congratulations on writing your first code in PHP!
Getting Started:
Continuing the PHP Environment Setup article, it is time to start learning PHP more technically.
Build a Document in PHP
You always need to create one or more PHP documents in VS Code Editor to start coding. There are two ways to create a document.
The first method is to use the icon

As shown in the image above, you can create a PHP document by clicking on the document creation icon. The only thing is that you should PHP files with the extension “php.”
The second method is what we mentioned above
What Is a Variable?
A variable is like a container that you can fill with values. Depending on the size and capacity of the container, different amounts of variables can fit it.
There are also variables in programming languages that you can fill with strings, arrays, numbers, and so on.
Rules for Defining Variables in PHP:
The first rule you need to follow to define the variable in PHP
is to use the $ sign (DollarSign) before the variable name.
The second rule is about variable naming:
- you cannot start the variable name with a number.
- You can start naming variables with English letters or _ (underscore).
- PHP is case sensitive. Therefore, the two variables named a and A are entirely different from each other.
- There should be no space between words. You can use underscore or Camel Notation to specify terms in naming. In the Camel Notation method, you lowercase the first letter of the first word of the variable and start the other words with the first uppercase letter. Note the following example:
$thisIsTestVar
In the example above, we started the word “this” with a lowercase letter. But the rest of the first letters are uppercase.
Assigning a Value to a Variable
To assign a value to a variable, you should use the = sign (equal) and then register the value. Note the following example.
<? php
$ number = 2;
There are two things you should always keep in mind. The first one is to put a ; (semicolon) at the end of every line of the code. If you don’t apply it, you will encounter errors.
The second point is that the input value of the variable determines its type.
In the example above, when we give the number to the variable, it is changed to an “integer variable”. However, if we give it a string, the type of the variable will be the string.
Variable Types in PHP:
There are different variables available in PHP and other programming languages. String, Integer, Array, Boolean are some of them. We will discuss these variables here.
String Variables:
First of all, you should note that to create a variable, you should follow the naming rules mentioned above.
As stated, the type of variable is specified at the time of value assignment. The string value should be inserted whether between two double quotation marks or two single quotation marks. These two methods for making string variables are entirely different.
<? php
$ name = “Harry Smith”;
In the above code, we put a name in the double quotation mark and assign it as a value to the name variable.
If we check this variable with the is_string () function, which checks whether the given variable is a string, it provides us output 1, which indicates that it is a string.
<? php
$ name = “Harry Smith”;
echo is_string ($ name);
The difference between the double quote and a single quote string is that you can insert your variable in the double quote to get its value in the string. In contrast, the variable name is inserted inside the string when you use single quotation marks, not the variable’s value.
Another difference is that you can use n \ and similar characters in double quotation marks to create a new line inside the source code as well as other functions. However, in single quotation marks, these characters do not work.
<? php
$ name = “Harry Smith”;
echo “my name is $ name”;
According to the above, the output of this code should be like this.
my name is Harry Smith
But if we use single quotation mark:
<? php
$ name = “Harry Smith”;
echo ‘my name is $ name’;
The output will be as follows:
my name is $ name
