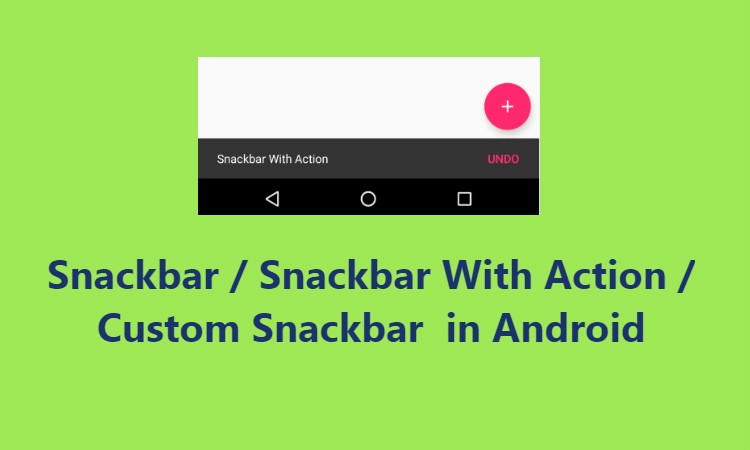
In the past, It was common among developers to use Toast to display an app notification to the user. With the introduction of the Material Design library, a new tool called Snackbar was introduced. The Snackbar is very convenient to use and, at the same time, offers a very good user experience. This utility can also be a great alternative to Toast in your Android applications.
You may have heard of Snackbar before, but you haven’t used it yet. This article introduces you to this tool and teaches you how to practically use Snackbar in Android. If you want to learn this simple yet practical tool, stay tuned to the SOJECT training website till the end of the article.
What Is The Android Snackbar?
Before discussing the Snackbar tutorials, let’s get more familiar with this practical tool.
Snackbar is actually an excellent alternative to Toast in Android. As you know, in the past, developers used Toast to send notifications to users. However, a more powerful tool is available today. Android Snackbar has more features. This superiority helps it in establishing an advantage over the competitors. Here you can learn more about building and personalizing this efficient tool.
Learn more: Why Am I a Flutter Programmer? Introducing Flutter Language
Preparing to Use Snackbar on Android
You can create and use Snackbar in AppCompatActivity and CoordinatorLayout using this article tutorial. However, to make and use it in the onCreate () function or any other function, You must insert it into your Layout, by simply dragging and propping.
In addition, you need to define an ID for it to access it in different classes.
How to Make a Snackbar on Android
As mentioned, you can use AppCompatActivity and CoordinatorLayout to display and use the Snackbar on Android.
How to Build a Snackbar in AppCompatActivity
To build this tool in AppCompatActivity, you need the following codes:
Snackbar.make(findViewById(R.id.your_id), "your Message", your duration).show()In the following, we will explain more about the Snackbar arguments.
How to build a Snackbar in CoordinatorLayout
You can create a Snackbar in CoordinatorLayout using the following command:
val snackBar = Snackbar.make(coordinatorLayout, "your Message", your duration)
        snackBar.show()
Note that in both methods, you must call the show () method. Only in this way is it possible to display the snack bar in your application.
Tips on Snack Bar Making Codes
As you know, to use any object or tool in Android programming, you have to call the class of that tool and create a new object from it. To create a Snackbar in AppCompatActivity, we use the static method of the snack bar class called “make.” This method gets three arguments:
- The first argument is the snack bar that you created in your layout, and you introduce it to this method by ID.
- The second argument is plain text that you want to display in Snack Bar.
- The third argument is the length of time you want this Snackbar to be displayed to users.
As you can see, setting up a Snackbar is not difficult. However, using the Snackbar in CoordinatorLayout is a little different. You need to create an object of the Snackbar class and set it equal to the static “make” method.
This method also takes three arguments, the last two ones are similar to the previous method. The only difference is in the first argument that you have to pass the CoordinatorLayout.
Determining the Snackbar duration
As mentioned, the third argument determines the Snackbar duration which is defined using the Snack Bar class constants. In general, there are three constants:
- The first model of the Snackbar duration is the LENGTH_SHORT constant, which displays the snack bar for a short time.
- The second model is LENGTH_LONG, which provides a longer display time.
- The third one is the LENGTH_INDEFINITE constant, which makes the snack bar visible during a particular operation time.
Note that in LENGTH_INDEFINITE mode, the snack bar is visible to the user until the View is lost or you dismiss the snack bar.
Adding a Button to Snack bar Android
Sometimes you need a button on the snack bar to help the user do something by clicking on it. In fact, the possibility of embedding a button is one of the best advantages of using the Snack Bar. There are two ways you can place the button in the Snack Bar.
Snack bar Button in AppCompatActivity
To add the button in AppCompatActivity, use the following code:
Snackbar.make(findViewById(R.id.your_id), "your Message", your duration)
            .setAction("your text") {
                TODO("your action")
            }
            .show()
Note: At Kathleen, we use Lambda Expression to implement SetOnClickListener.

Snack Bar Button in CoordinatorLayout
Use the following codes to place the button in CoordinatorLayout:
val snackBar = Snackbar.make(coordinatorLayout, "your Message", your duration)
            .setAction("your text") {
                TODO("your action")
            }
        snackBar.show()
Change the Colors in the Snack bar.
One of the advantages of Snack Bar on Android over Toast is the great personalization it provides to the developer. You can change the colors of your snacks, buttons, and snack bar background.
To change the background color use the following code:
val snackBar = Snackbar.make(coordinatorLayout, "your Message", your time)
            .setAction("your text") {
                TODO("your action")
            }
        snackBar.view.setBackgroundColor(Color.parseColor("your color"))
        snackBar.show()
To change the text color use the following codes:
val snackBar = Snackbar.make(coordinatorLayout, "your Message", your time)
            .setAction("your text") {
                TODO("your action")
            }
        snackBar.view.setBackgroundColor(Color.parseColor("your color"))
        snackBar.setTextColor(Color.parseColor("your color"))
        snackBar.show()
And Finally to change the color of buttons use this one:
val snackBar = Snackbar.make(coordinatorLayout, "your Message", your time)
            .setAction("your text") {
                TODO("your action")
            }
        snackBar.view.setBackgroundColor(Color.parseColor("your color"))
        snackBar.setTextColor(Color.parseColor("your color"))
        snackBar.setActionTextColor(Color.parseColor("your color"))
        snackBar.show()
